
Upgrading from Windows 11 to Windows 12 is a relatively easy process. Sometimes it may seem daunting, but by following our step-by-step guide, you’ll find it quite straightforward. As you are aware, Windows 12 is Microsoft’s latest operating system and represents the future of computing. It is set to be released in the middle of this year, 2024. Once this OS is launched, our guide will assist you in seamlessly upgrading from Windows 11 to 12.
The anticipation for Windows 12 is generating considerable buzz in the online world. It stands out as one of Microsoft’s most effective and futuristic operating systems to date. With Windows 12, you can expect to experience the power of AI, along with enhanced speed and functionality.
In today’s article, we will provide a comprehensive step-by-step guide for upgrading to Windows 12. Whether you’re currently using Windows 11, this guide will undoubtedly aid you in transitioning to the new operating system.
Checking for compatibility
Before diving into the upgrade process, it’s crucial to ensure that your system is compatible with Windows 12. Compatibility issues can arise due to hardware specifications or software configurations. To begin, review the minimum system requirements outlined by Microsoft for Windows 12.
This typically includes processor speed, RAM, storage space, and graphics capabilities. Additionally, consider any peripherals or third-party software installed on your system that may require updates or compatibility checks.
Running the Windows 12 compatibility tool provided by Microsoft can streamline this process, identifying potential issues and providing solutions. By thoroughly checking for compatibility beforehand, you can avoid potential pitfalls and ensure a smooth transition to the new operating system.
Choosing Your Device for Windows 12
Windows 12 can work on computers that have the basic hardware it needs. It might already be on new computers, or you might be able to update older ones that use Windows 11.
Check System Requirements for Windows 12 Here
To see if your current computer with Windows 11 can handle Windows 12, you can use a tool called PC Health Check when it’s available. For more details about what your computer needs, look at the specs and requirements for Windows 12.
If you’re using an older version of Windows like Windows 10 or something even earlier, or if your computer isn’t powerful enough for Windows 12, it might be time to think about getting a new computer that can run Windows 12. Just find one that fits what you need.
Backup Your Files Before upgrading
Before upgrading to Windows 12, it’s essential to back up all your files to ensure you don’t lose anything important during the process.

- Identify Important Files: Take some time to locate and identify all the files you want to back up. This includes documents, photos, videos, music, and any other data you don’t want to lose.
- Choose a Backup Method: There are several ways to back up your files. You can use an external hard drive, USB flash drive, cloud storage services like Microsoft account to transfer files, Google Drive or Dropbox, or even a combination of these methods for added security.
- Copy Files to Backup Location: Once you’ve chosen your backup method, start copying your files to the backup location. Make sure to organize them properly so that you can easily find them later if needed.
- Verify Backup: After copying your files, double-check to ensure that everything has been successfully backed up. It’s a good idea to open a few files from the backup location to make sure they are intact and accessible.
- Create a Backup Plan: Consider setting up automatic backups to ensure that your files are regularly backed up in the future. This can help prevent data loss in case of unexpected events like hardware failure or malware attacks.
Installing Windows 12
Once you’ve confirmed that your device is ready for the upgrade to Windows 12, the installation process can begin.
Here’s how to proceed:
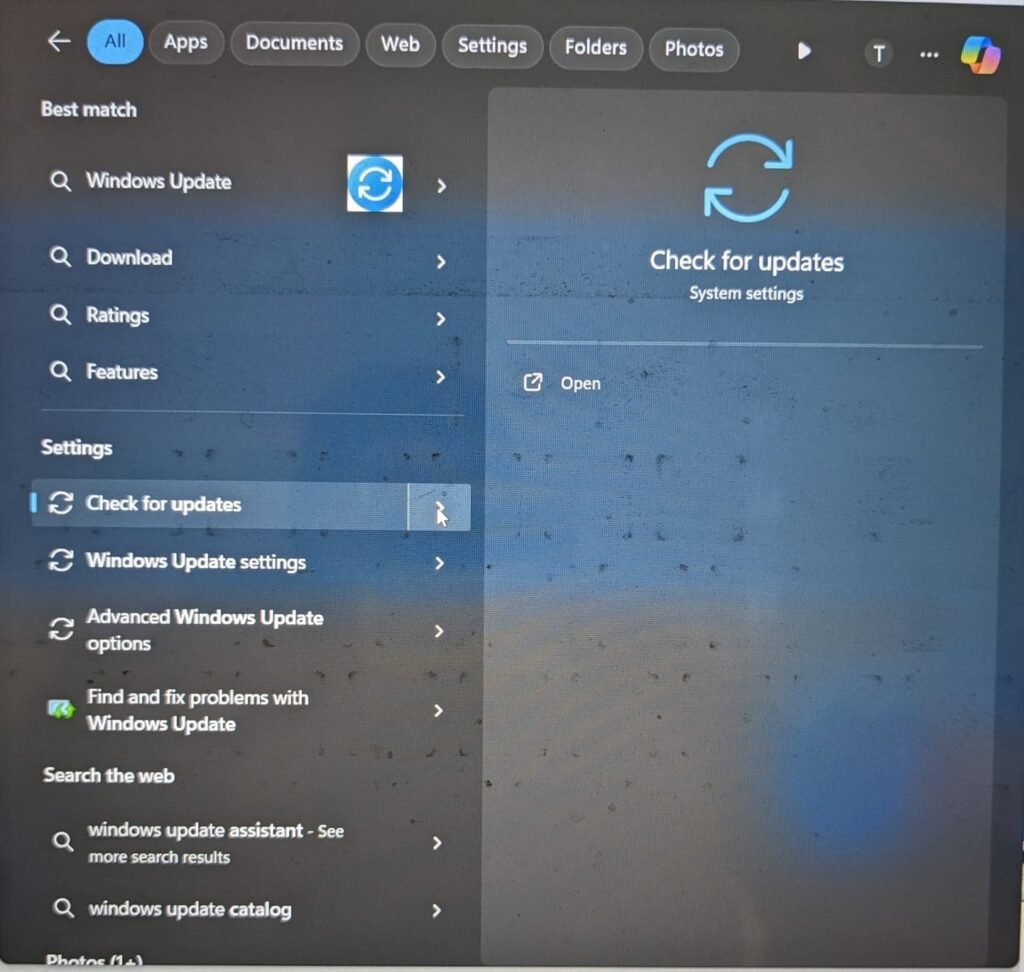
- Check for Windows 12 Availability: Navigate to Start 🪟> Settings ⚙️> Update & Security🛡️ > Windows Update, and select “Check for updates” to see if the Windows 12 upgrade is available for your device.
- Download and Install: If the upgrade is listed as available, and you wish to proceed, simply download and install it. This process may take longer than typical updates, so be patient. You can continue using your PC while the download is in progress. Additionally, you have the option to schedule the installation for a specific time when you don’t plan to use your computer.
- Follow On-screen Instructions: Once the download is complete, follow the on-screen instructions to proceed with the installation. Windows will guide you through the process, which may involve restarting your computer several times.
- Completion: After the installation is complete, your device will restart, and you’ll be greeted with Windows 12. Take some time to explore the new features and functionalities of the operating system.
By following these steps, you can smoothly install Windows 12 on your device and enjoy the latest enhancements and improvements it offers.