
Hey, Windows lovers, are you willing to know about how to check CPU temperature in the upcoming Windows 12? Do you want to know all about Windows 12? Then you have come to the right website. We are a dedicated website for Windows 12 downloads, apps, software, tips, and tricks.
Windows 12 is set to launch later this year, around mid-June or July, generating significant anticipation. It is touted as the most advanced Windows version yet. With Windows 11 users eagerly awaiting the arrival of Windows 12 and its promised advanced features, excitement is mounting. In today’s article, we will share a comprehensive guide on how to check CPU temperature in Windows 12.
5 Easy Process for Checking CPU Temperature in Windows 12
Monitoring your CPU temperature is crucial for ensuring the optimal performance and longevity of your computer. With the release of Windows 12, users are often left wondering how to check this vital metric. In this guide, we’ll walk you through various methods to easily monitor your CPU temperature in Windows 12, helping you keep your system running smoothly.
🧑💻Using Task Manager: One of the simplest ways to check CPU temperature in Windows 12 is through Task Manager. Here’s how:
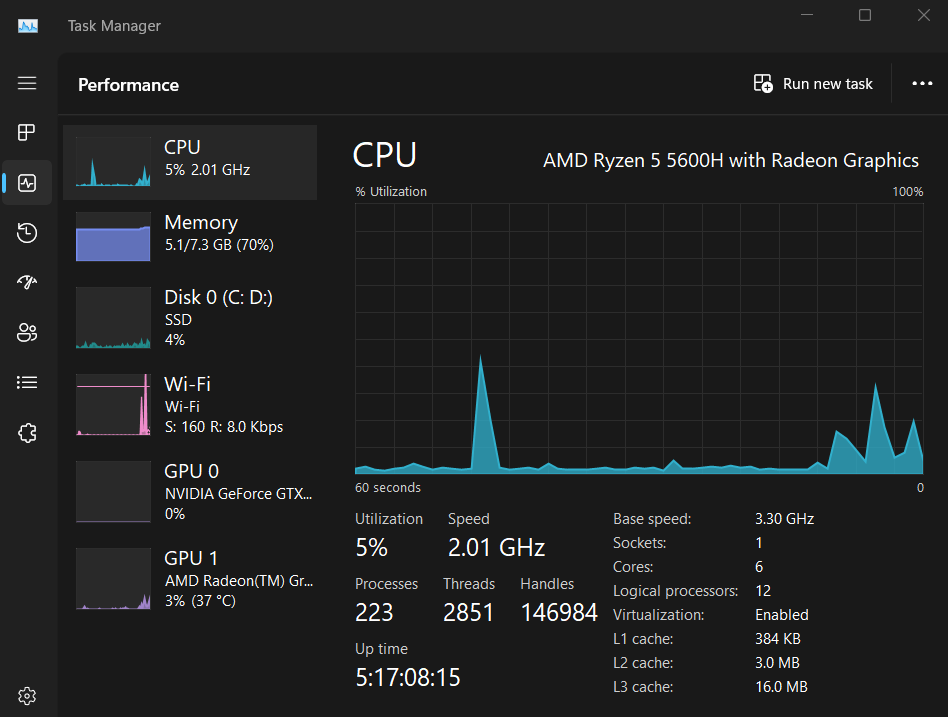
- Right-click on the taskbar and select “Task Manager” or press “Ctrl + Shift + Esc” to open it directly.
- Once Task Manager is open, click on the “Performance” tab.
- Here, you’ll find various performance metrics. Click on “CPU” to expand it.
- You’ll see your CPU temperature displayed under the “Temperature” section.
Third-Party Software: There are several third-party software options available for monitoring CPU temperature in Windows 12. Some popular choices include HWMonitor, Core Temp, and CPU-Z. These programs offer more detailed information about your CPU temperature and additional features like logging and alerts.
BIOS/UEFI: Another method to check CPU temperature is by accessing your computer’s BIOS/UEFI settings:
- Restart your computer and enter BIOS/UEFI by pressing the designated key (usually Del, F2, F10, or Esc) during startup.
- Once in BIOS/UEFI, navigate to the hardware monitoring section. The location and options may vary depending on your motherboard manufacturer.
- Here, you can find CPU temperature readings along with other system health metrics.
Using Command Prompt: Windows Command Prompt also provides a way to check CPU temperature:
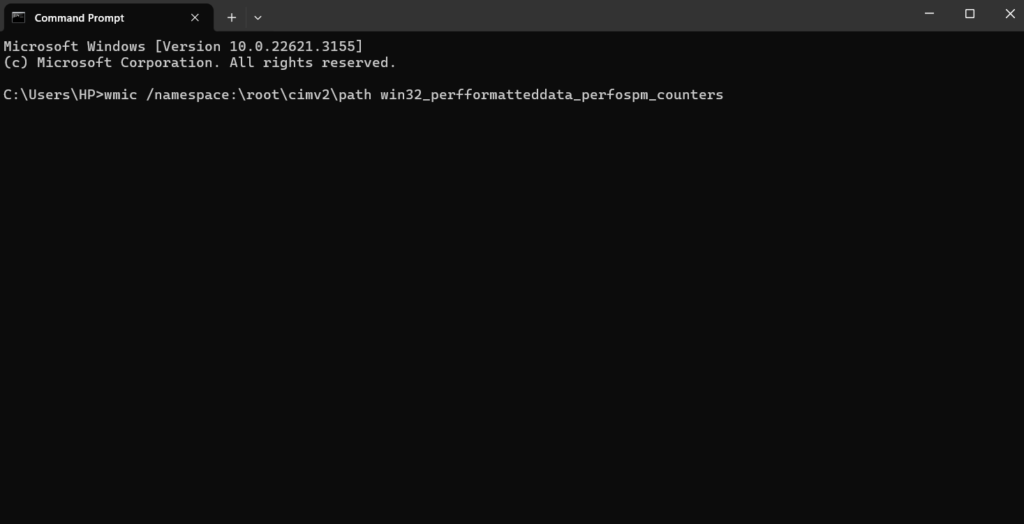
- Open Command Prompt by typing “cmd” in the search bar and selecting it from the results.
- Type the command “wmic /namespace:\root\cimv2\path win32_perfformatteddata_perfospm_counters where (Name=’_Total’ and CounterSetName=’Processor Information’) get Temperature” and press Enter.
- This command will display the CPU temperature of your system.
GPU-Z: While primarily used for monitoring GPU performance, GPU-Z also provides CPU temperature readings:
- Download and install GPU-Z from the official website.
- Launch the program and navigate to the “Sensors” tab.
- Here, you’ll find various temperature readings, including CPU temperature.
Conclusion: Monitoring your CPU temperature is essential for maintaining the health and performance of your computer, especially in Windows 12 where system optimization is key. By following the methods outlined in this guide, you can easily keep track of your CPU temperature and take the necessary steps to prevent overheating and potential hardware damage. Whether you prefer using built-in tools like Task Manager or opting for third-party software, staying vigilant about your CPU temperature will ensure a smoother computing experience.