Setting environment variables in Windows 11 and 12 is not a challenging task if you follow the exact and correct guide. You can easily set environment variables in both windows (11 & 12). Although there are many differences between Windows 11 and 12, the process for setting environment variables in both operating systems is almost the same.
In today’s article, we will share an easy-to-follow guide to set environment variables in Windows 11 and Windows 12. By following our guide, you will surely be able to set environment variables in Windows. Additionally, we will cover what environment variables are, how they are useful, how to set them, etc.
What is the Environment variable in Windows 11 & 12?
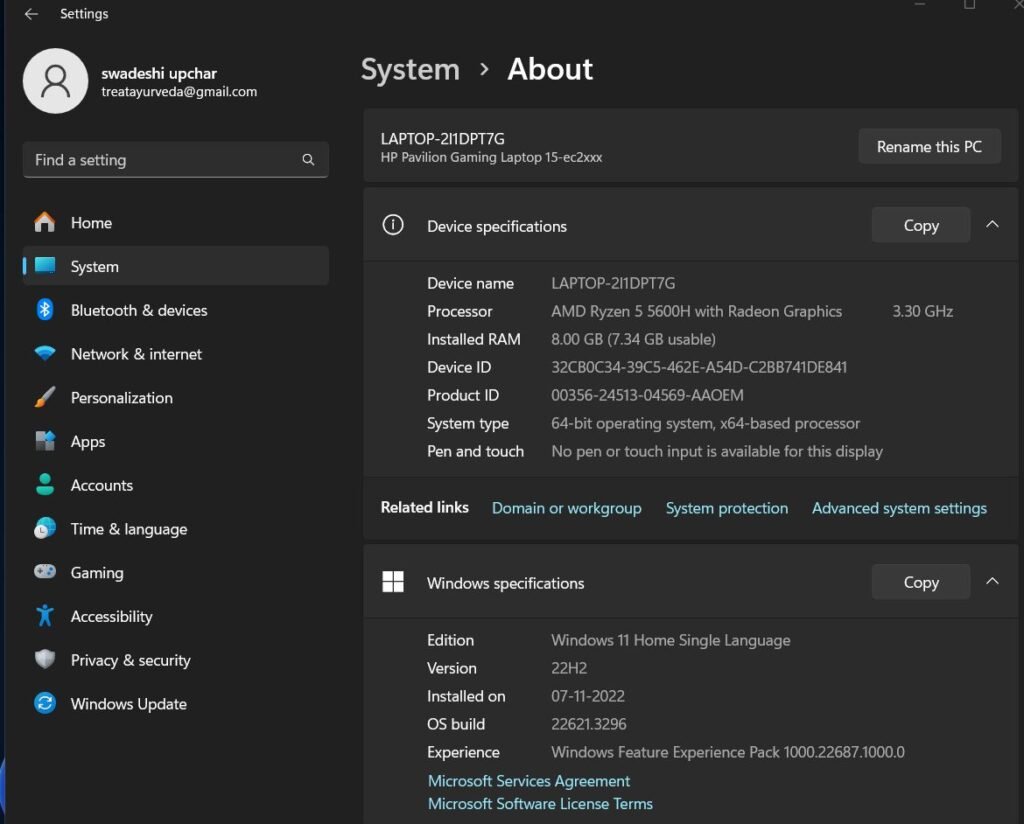
Environment variables in Windows 11 & 12 are a set of dynamic named values that can affect how running processes behave on a computer. They are part of the operating environment in which a process runs. For example, an environment variable can specify where the operating system can find user profiles, applications, and files.
In both windows, environment variables can be set and edited through various methods, such as using the Settings app, Command Prompt, or Windows PowerShell. They are categorized into three types:
- System Environment Variables: These are global and can be accessed by all users and applications on the system. They define system-wide settings.
- User Environment Variables: These are specific to the current user’s profile and can be set by the user or applications running under that account.
- Process Environment Variables: These are temporary and apply only to the current process and its child processes.
Setting Process of Environment Variables in Windows 11 & 12
There are several methods to set environment variables in Windows, and here we have outlined four easy-to-follow methods to help you efficiently set them up.
Method 1: Using System Properties
- Open System Properties:
- Press
Windows key + Xand select “System” from the menu. - Alternatively, right-click on “This PC” or “My Computer,” select “Properties.”
- Press
- Access Advanced System Settings:
- On the left sidebar, click on “Advanced system settings.”
- This will open the System Properties window.
- Navigate to Environment Variables:
- In the System Properties window, click on the “Advanced” tab.
- Under the “Advanced” tab, click on the “Environment Variables” button.
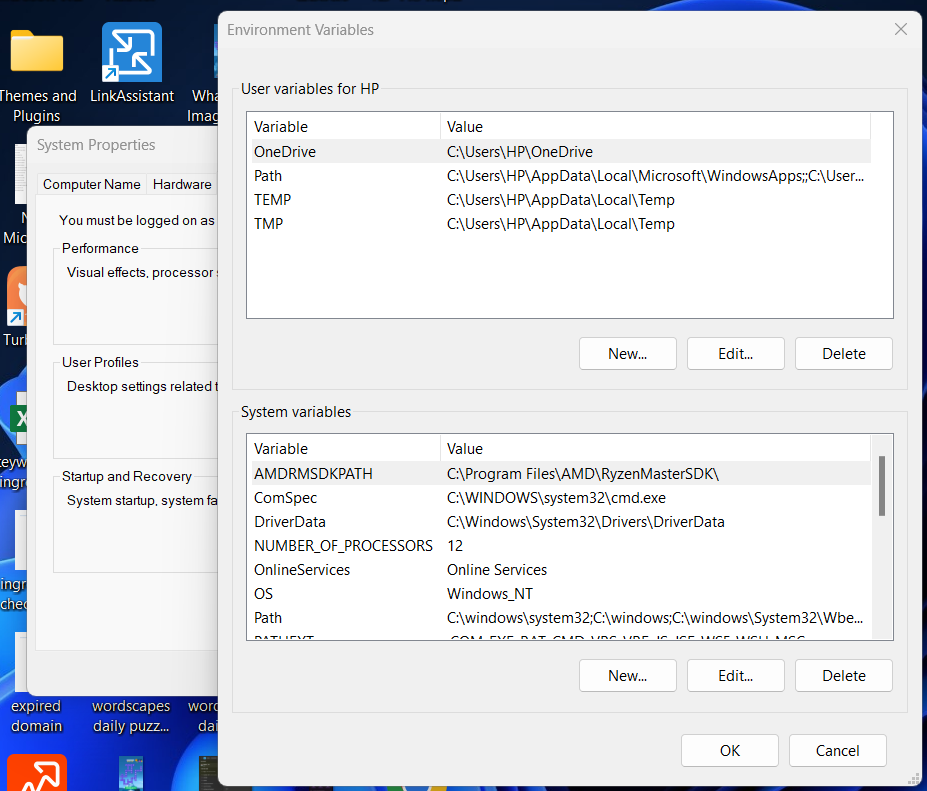
- Edit System Environment Variables:
- In the Environment Variables window, you’ll see two sections: User variables and System variables.
- To edit system-wide variables, scroll down to the “System variables” section and click “New” to add a new variable or select an existing variable and click “Edit” to modify it.
- Add or Edit Environment Variables:
- Clicking “New” allows you to add a new variable. Enter the variable name and its value.
- Clicking “Edit” allows you to modify the selected variable’s value.
- Apply Changes:
- After adding or editing variables, click “OK” on all open windows to apply the changes.
Method 2: Using Command Prompt

- Open Command Prompt as Administrator:
- Right-click on the Start menu and select “Windows Terminal (Admin)” or “Command Prompt (Admin).”
- Set Environment Variable:
- To set a temporary environment variable, use the
setcommand followed by the variable name and value. For example: set MY_VARIABLE=value - To set a permanent environment variable, use the
setxcommand instead. For example:setx MY_VARIABLE value
- To set a temporary environment variable, use the
- Verify:
- To verify that the variable has been set, you can use the
echocommand. For example: bashecho %MY_VARIABLE%
- To verify that the variable has been set, you can use the
Method 3: Using PowerShell
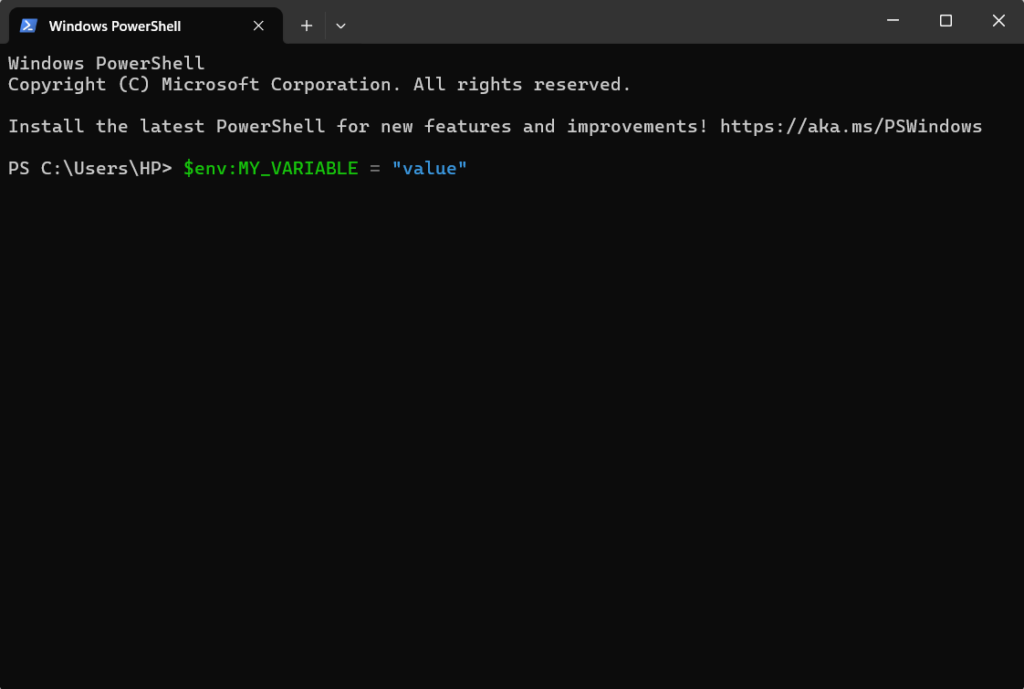
- Open PowerShell as Administrator:
- Right-click on the Start menu and select “Windows PowerShell (Admin).”
- Set Environment Variable:
- To set a temporary environment variable, use the
$env:notation followed by the variable name and its value. For example: ruby$env:MY_VARIABLE = "value" - To set a permanent environment variable, use the
[System.Environment]::SetEnvironmentVariable()method. For example: CSS[System.Environment]::SetEnvironmentVariable("MY_VARIABLE", "value", "Machine")
- To set a temporary environment variable, use the
- Verify:
- To verify that the variable has been set, you can use the
$env:notation. For example: ruby$env:MY_VARIABLE
- To verify that the variable has been set, you can use the
Method 4: Using Environment Variables Editor
- Search for “Environment Variables”:
- Open the Start menu and search for “Environment Variables.”
- Open Environment Variables Editor:
- Click on “Edit the system environment variables” from the search results. This will open the System Properties window.
- Navigate to Environment Variables:
- Follow steps 3-5 from Method 1 to edit system environment variables.
- Add or Edit Environment Variables:
- Follow steps 5-6 from Method 1 to add or edit environment variables.
- Apply Changes:
- After adding or editing variables, click “OK” on all open windows to apply the changes.
By following any of these methods, you can easily set environment variables in both Windows 11 and 12 according to your preference and requirements. If you encounter any difficulties, feel free to leave a comment, and we’ll be happy to assist you further.
Thanks