Windows 12 is the latest operating system from Microsoft, and it comes with many new features and improvements. However, it also comes with some bloatware, which are pre-installed apps and services that you may not need or want. Bloatware can slow down your PC, consume your disk space, and compromise your privacy. Therefore, it is advisable to debloat Windows 12 to improve its performance and user experience.
There are different methods to debloat Windows 12, depending on your preference and skill level. In this article, we will show you four ways to debloat Windows 12, from the easiest to the most advanced. You can choose the method that suits you best, or combine them for optimal results.
Method 1: Uninstall Unwanted Apps from Settings
The easiest and safest way to debloat Windows 12 is to uninstall the unwanted apps from the Settings app. This method does not require any special tools or commands, and it allows you to remove the apps that you don’t use or like. However, this method may not remove all the bloatware, as some apps are considered system apps and cannot be uninstalled from the Settings app.

To use this method, follow these steps:
- Click on the Start menu and go to Settings.
- In the Settings app, click on Apps from the left sidebar.
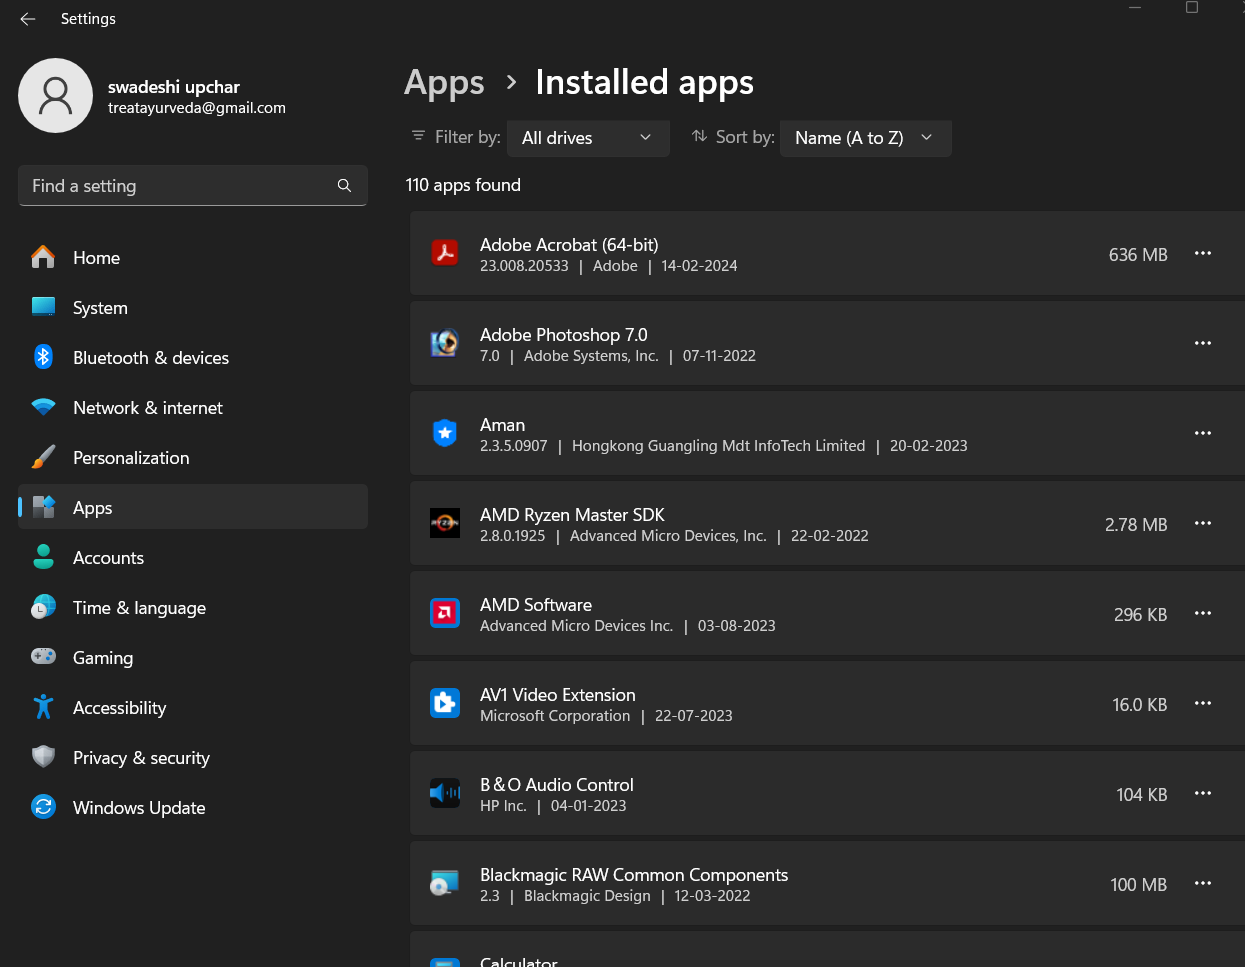
- On the Apps page, click on Installed Apps.
- On the Installed Apps page, you will see a list of all the apps installed on your PC. Scroll through the list and find the apps that you want to remove. Some examples of bloatware apps are Candy Crush Saga, Farm Heroes Saga, Microsoft Solitaire Collection, Skype, Xbox, and Your Phone.
- To uninstall an app, click on the three dots next to the app name and select Uninstall.
- Click on Uninstall again to confirm.
- Repeat the steps for all the apps that you want to remove.
Method 2: Use a Third-Party Debloater Tool
Another way to debloat Windows 12 is to use a third-party debloater tool, which is a program that can automatically remove the bloatware apps and services from your PC. This method is more convenient and effective than the first method, as it can remove more bloatware and save you time. However, this method also requires more caution, as some debloater tools may remove some essential apps or services that you may need. Therefore, it is recommended to back up your data and create a system restore point before using a debloater tool.
There are many debloater tools available online, but one of the most popular and reliable ones is ThisIsWin11, which is also useful for Windows 12 and is a free and open-source tool that can customize and optimize Windows 12. To use this tool, follow these steps:
- Download ThisIsWin11 from its GitHub page.
- Extract the ZIP file and run the ThisIsWin11.exe file as administrator.
- On the main window, click on the Packages tab.
- On the Packages page, you will see a list of all the apps and services that the tool can remove. You can check or uncheck the items that you want to keep or remove. Some examples of bloatware items are Cortana, OneDrive, Microsoft Edge, Bing, Feedback Hub, and Windows Defender.
- After selecting the items, click on the Apply button at the bottom right corner.
- Wait for the tool to finish the process and restart your PC.
Method 3: Use PowerShell Commands
A third way to debloat Windows 12 is to use PowerShell commands, which are commands that can execute various tasks and scripts on your PC. This method is more advanced and powerful than the previous methods, as it can remove the most bloatware and give you more control over your PC.
However, this method also requires more skill and knowledge, as you need to know the exact commands and parameters to use. If you use the wrong commands or parameters, you may damage your system or lose your data. Therefore, it is advised to back up your data and create a system restore point before using PowerShell commands.
Many PowerShell commands can debloat Windows 12, but one of the most comprehensive and easy-to-use ones is the Windows11Debloater script, which is a script that can remove the bloatware apps and services from Windows 11 and Windows 12. To use this script, follow these steps:
- Press the Windows key and type PowerShell. Right-click on the PowerShell app and select Run as administrator.
- In the PowerShell window, type the following command and press Enter:
iwr -useb [9](https://git.io/debloat)|iex
This command will download and run the Windows10Debloater script from the internet.
- On the Windows11Debloater window, you will see several options to debloat your PC. You can choose to debloat your PC with the default settings or customize your settings. Some examples of the options are Disable Cortana, Uninstall OneDrive, Disable Telemetry/Tasks, and Remove Bloatware with Custom Blocklist.
- After selecting the options, click on the Run button at the bottom right corner.
- Wait for the script to finish the process and restart your PC.
Method 4: Use Registry Editor
A fourth way to debloat Windows 12 is to use Registry Editor, which is a tool that can edit the registry, which is a database that stores the settings and options of your PC. This method is the most advanced and risky one, as it can remove the most bloatware and give you the most control over your PC. However, this method also requires the most skill and knowledge, as you need to know the exact registry keys and values to edit. If you edit the wrong registry keys or values, you may damage your system or lose your data. Therefore, it is strongly recommended to back up your data and create a system restore point before using Registry Editor.
There are many registry keys and values that can debloat Windows 12, but one of the most important ones is the NoLockScreen key, which can disable the lock screen, which is a feature that shows a picture and some information when you turn on or wake up your PC. The lock screen can be annoying and unnecessary, as it adds an extra step to log in to your PC. To disable the lock screen using Registry Editor, follow these steps:
- Press the Windows key and type regedit. Right-click on the Registry Editor app and select Run as administrator.
- In the Registry Editor window, navigate to the following path:
HKEY_LOCAL_MACHINE\SOFTWARE\Policies\Microsoft\Windows
- Right-click on the Windows folder and select New > Key. Name the new key Personalization and press Enter.
- Right-click on the Personalization key and select New > DWORD (32-bit) Value. Name the new value NoLockScreen and press Enter.
- Double-click on the NoLockScreen value and change its data from 0 to 1. Click OK.
- Close the Registry Editor and restart your PC.
Conclusion
In this article, we have shown you how to debloat Windows 12 to improve its performance using four different methods: uninstalling unwanted apps from Settings, using a third-party debloater tool, using PowerShell commands, and using Registry Editor. Depending on your preference and skill level, you can choose the method that suits you best, or combine them for optimal results. We hope this article has been helpful and informative for you. If you have any questions or feedback, please feel free to leave a comment below.
Thank you for reading.